


When a Windows computer is new, it runs fast and you may be tempted to think it will always be that way but the reality is that after a couple of years, it starts slowing down. Doing regular tasks like opening a web browser or viewing documents and pictures takes time, a lot longer time, and this can be frustrating. The fans also start spinning fast and it becomes audible. These are some of the things that you can do to fix a slow Windows 10 computer.
Delete Temporary Files
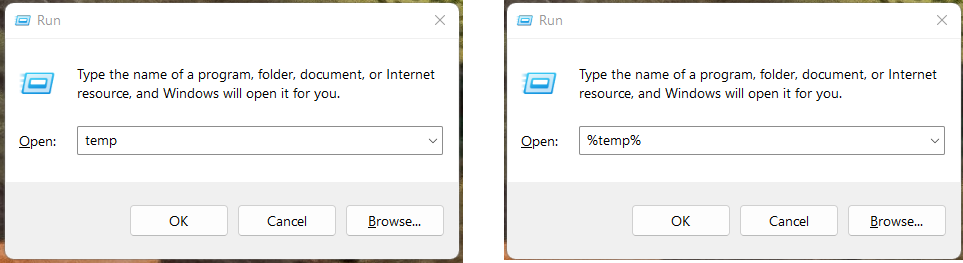
Over the course of a computer’s use, cache files pile up over time and it can slow down a computer. This is because some of them are outdated and it makes more sense to have updated by getting rid of existing files so you can generate new ones. To delete cached files on windows, click on the ‘ Windows Start + R ‘ key combination to open run then type temp. Delete all the files and folders in the folder that opens up. Click the ‘ Windows Start + R ‘ key combination to open run then type %temp% then delete all the files that are in this folder too. Click ‘Ctrl+A‘ to select all files and folders then delete all files and folders in the Temp folder.
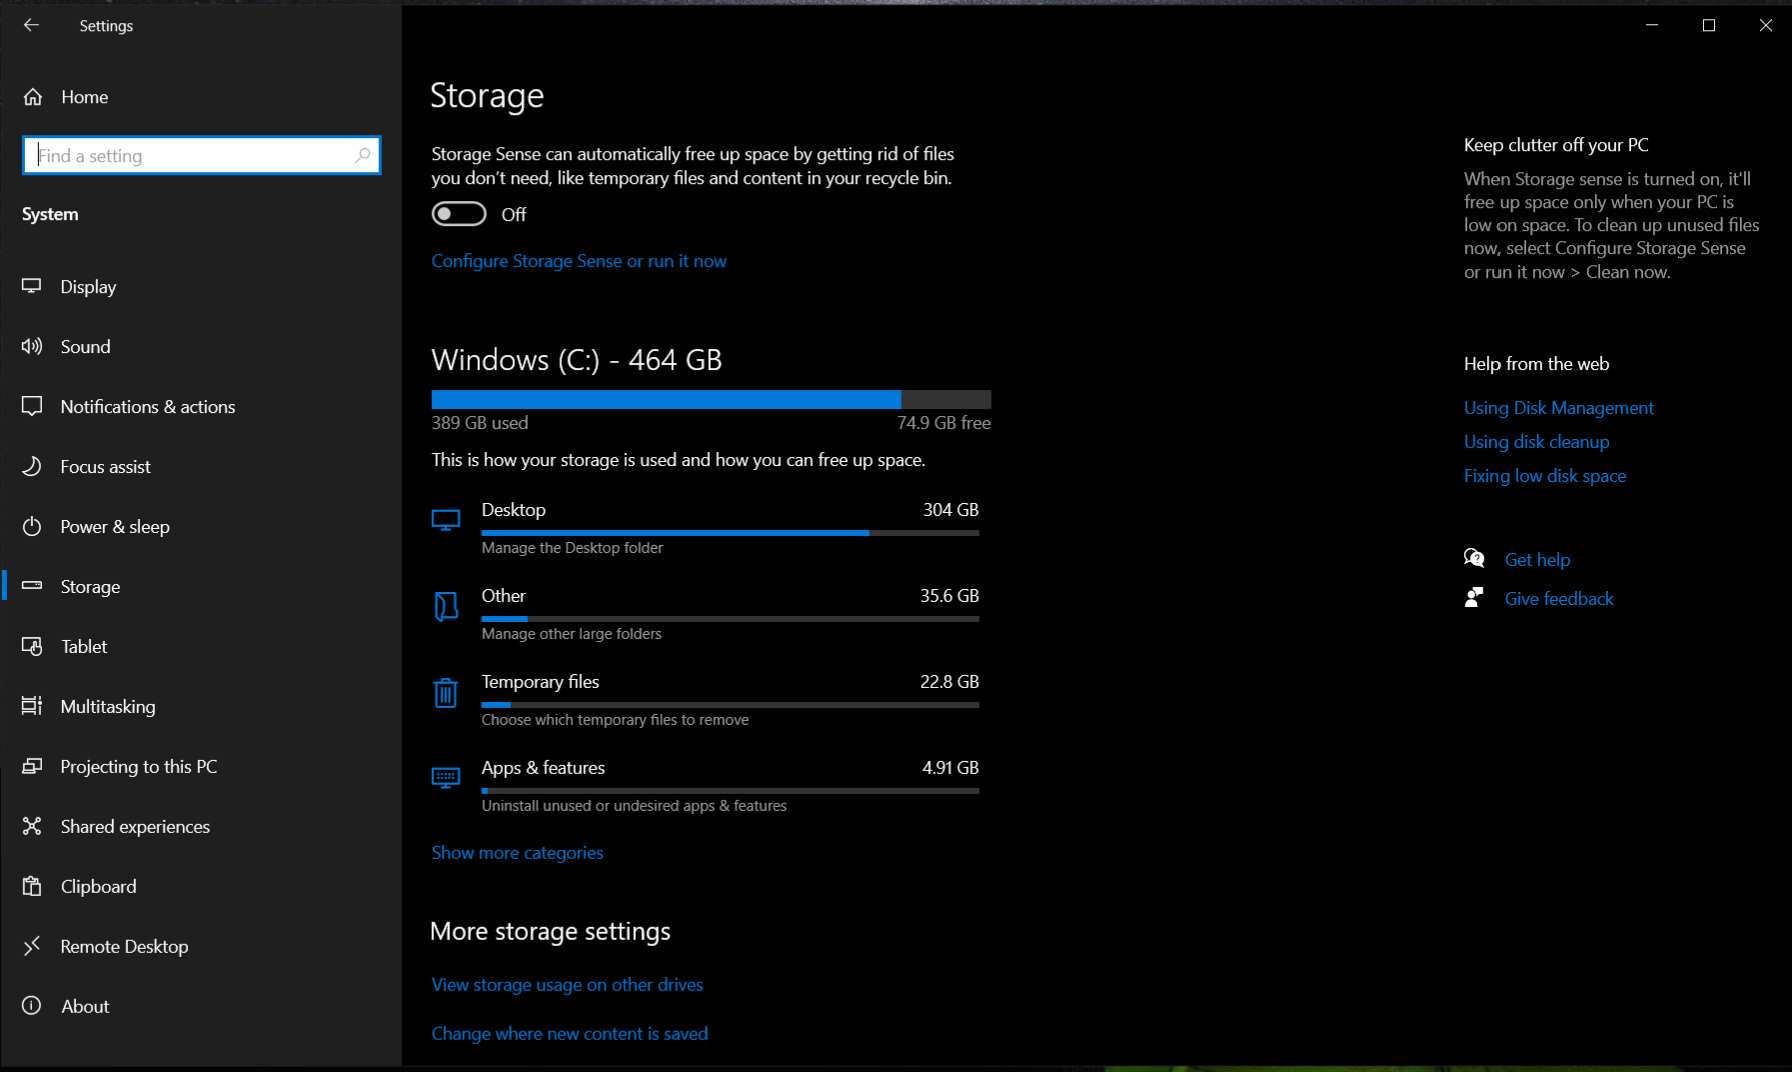
Once done with that, head over to Settings > System > Storage > Temporary Files then delete the files that you likely will never need especially the recycle bin and windows update Cleanup.
Disable Windows Search
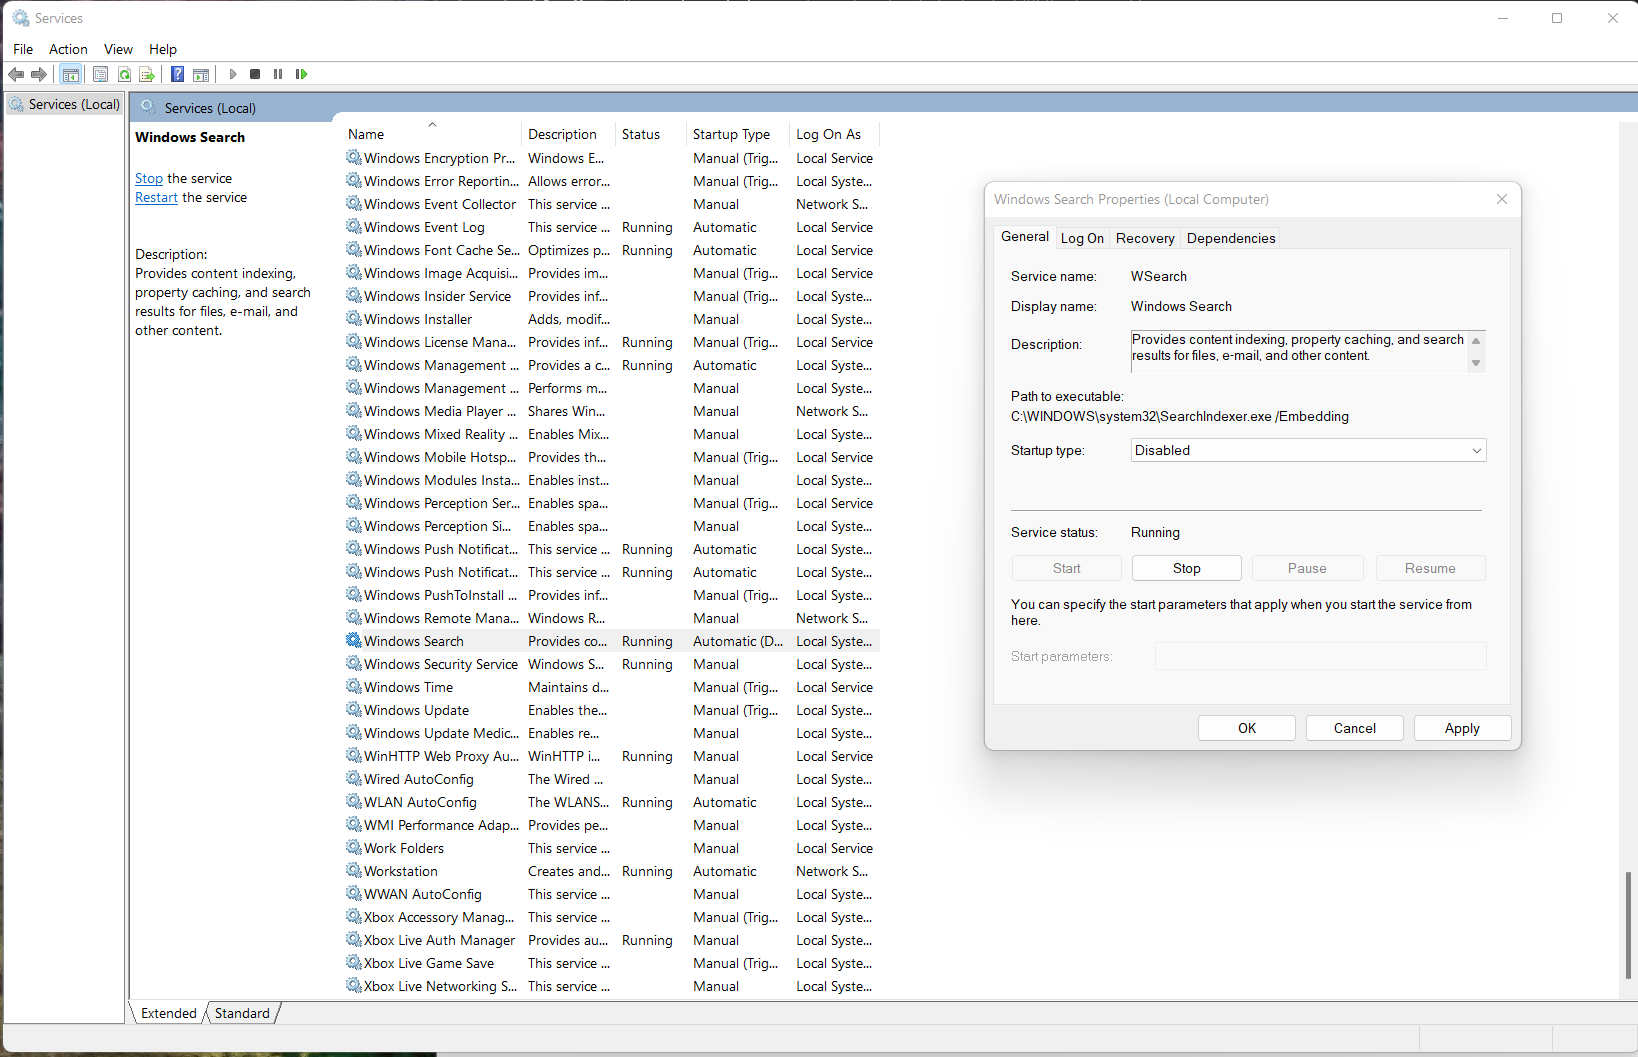
Windows Search automatically indexes files on your computer to speed up finding them but this comes with a performance penalty. Windows search is supposed to bring about drastic performance to fairly modern computers. Older computers suffer the most from this windows service and thus disabling Windows Search brings about faster performance by reducing Disk usage from 100% to fairly normal levels.
To disable Windows Search, navigate to Services by typing services.msc in the Windows Run text area. To open up Windows Run, hold the Windows/Start and R keys on your computer simultaneously. locate Windows Search under the services list, right-click on it then click on properties. Select Disabled under startup type then save this setting by clicking on Apply then OK. Restart your computer.
Disable SysMain / Superfetch
SysMain improves system performance by caching applications to your RAM thus speeding up the performance of these applications. Windows does this when you start your computer. Unfortunately for older computers, this causes them to slow down significantly. Disabling it helps speed up the speed of your computer for the few minutes that it encounters during startup.
To disable SysMain, open Windows Run by clicking Windows/Start + R then type services.msc. Locate SysMain, stop then disable it. It is important stopping then disable it in that order.
Disabling SysMain breaks ReadyBoost.
SysMain used to be called Superfetch.
Use ReadyBoost
ReadyBoost is a feature on Windows that allows the use of external storage devices to speed up the computer by storing cache data on it. ReadyBoost is only available on computers that still use HDD.
To use ReadyBoost, plug in a flash drive, preferably a USB 3.0 drive to a USB 3.0 port for speed, then navigate to File Explorer and right-click on the flash drive to reveal properties. Select the ReadyBoost tab and use the drive for ReadyBoost. This writes a 4.2GB file to your flash drive called ReadyBoost.sfcache.
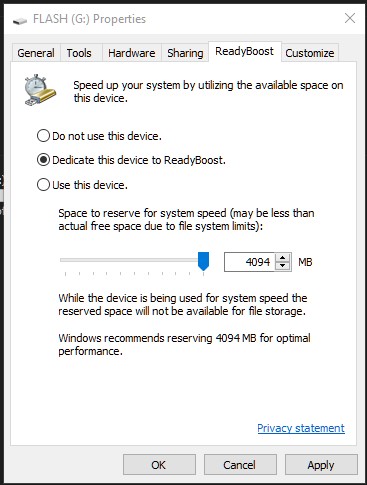
From my experience, ReadyBoost improves a computer’s performance though upgrading from an HDD to an SSD storage technology is a better deal since you still need to invest in an external flash drive if you do not have a spare one.
Delete Browser Cache
Cache is a good thing as It limits downloading of files multiples times by storing them locally and getting reused when needed. The cache can however get outdated and make websites seem slow and unresponsive in some cases. Deleting cache helps in restoring speed and responsiveness on websites. Here are ways to clear/delete cache on different browsers.
This method applies to slowing browser activities only.
Stop Background Apps
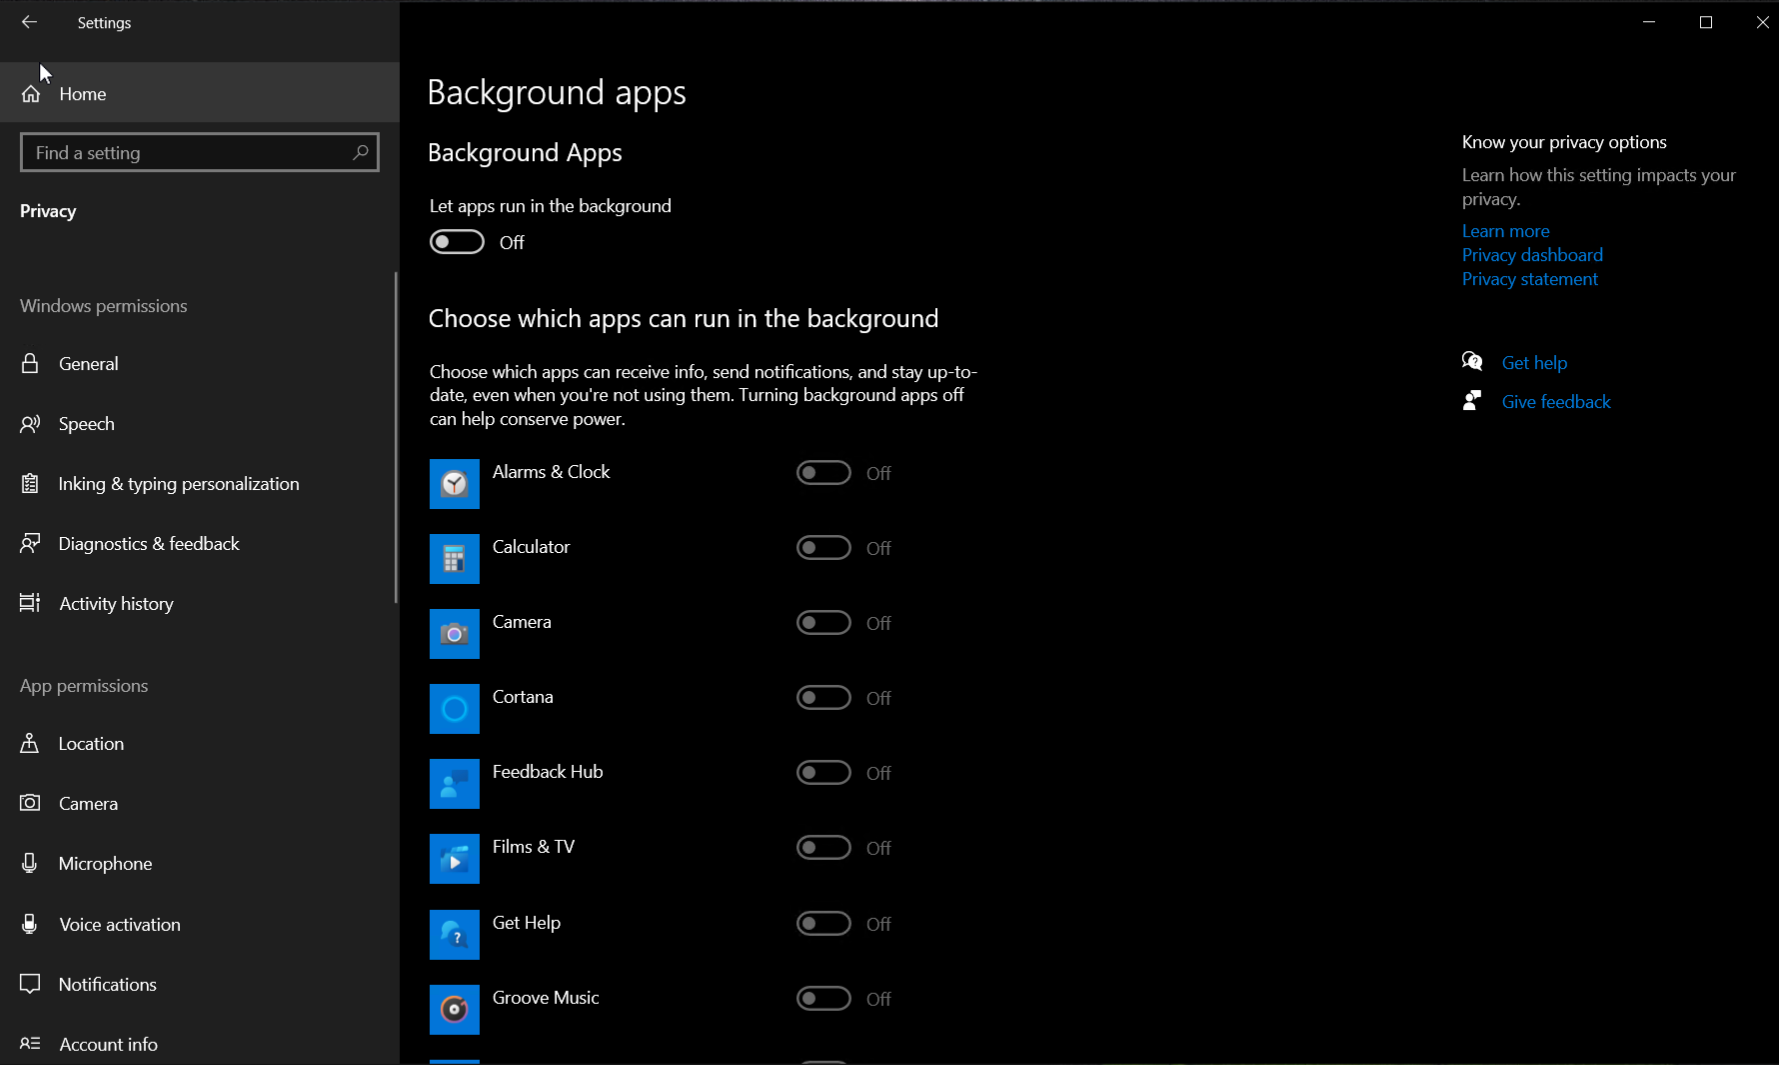
Background apps as the name suggests are services that run continuously in the background. They can consume system resources, especially resource-starved computers. Aging dual-core computers suffer a lot from this. To stop background services, head over to Settings > Privacy > Background apps then disable all of them. These apps will no longer run in the background consuming your system resources unnecessarily.
Disable Startup Applications
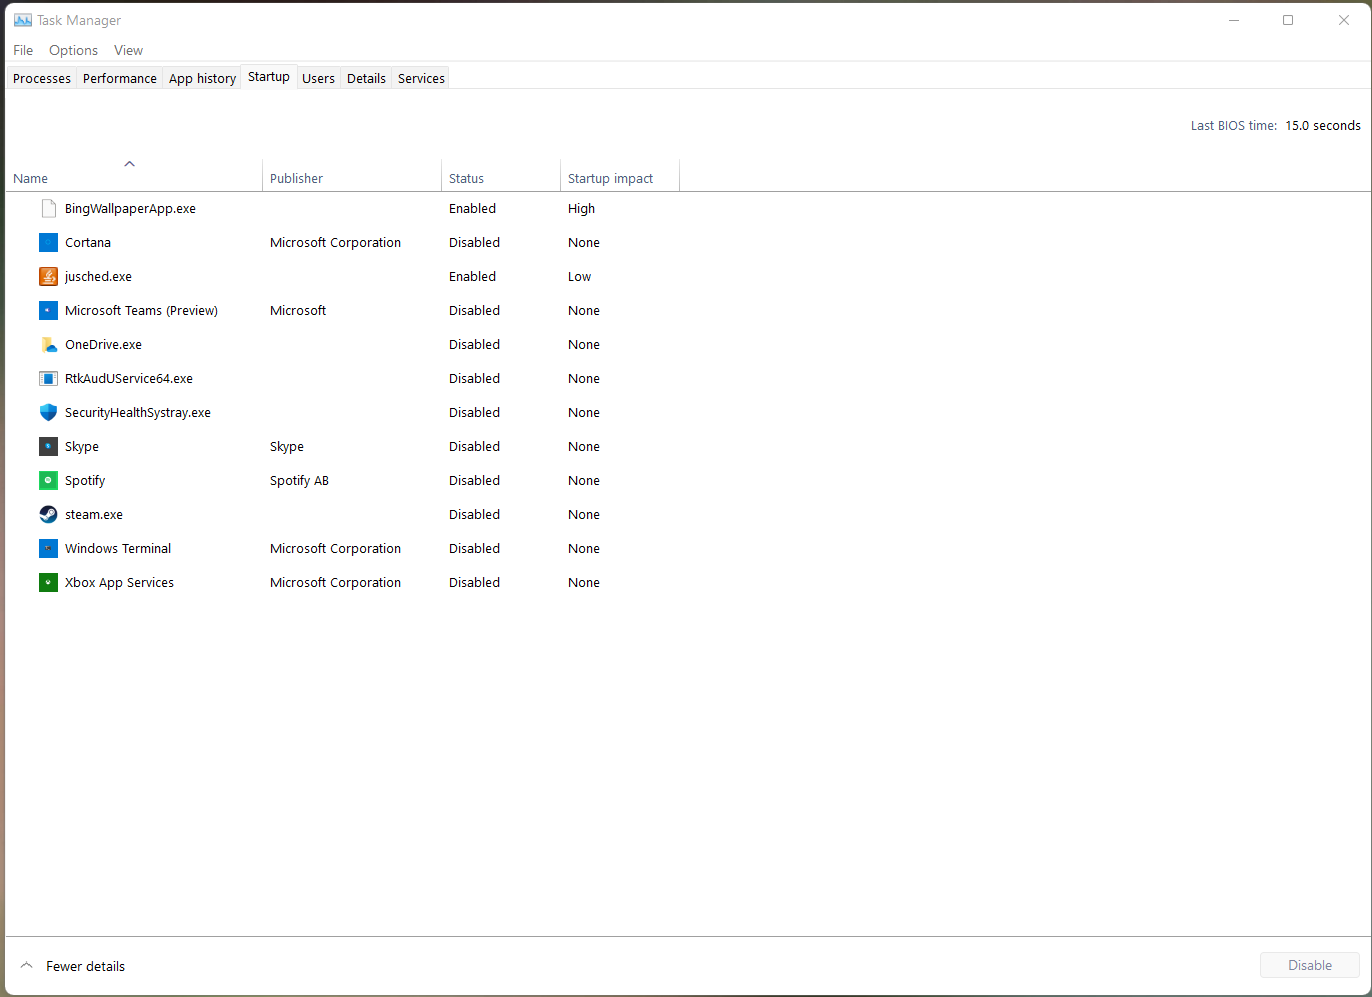
Some applications startup as soon as you turn on your computer, this makes the computer slow and takes longer to start as these applications are loaded as soon as Windows end booting or sometimes when in the process of booting. To disable startup applications, head over to the task manager then navigate to startup. Disable all unnecessary applications that you would like to start during boot.
Update your drivers and Windows
Old buggy drivers or a version of windows could be the reason your computer is slowing down. Head over to Settings > Update & Security then check for an update. Update your drivers by heading over to Device Manager, right-click on the specific hardware then check for an update.
Upgrade to Windows 11
Microsoft offers Windows 11 to all eligible windows 10 users: TPM 2.0, 4GB RAM, Dual-Core processor, and modern processors from Intel core 7th gen or later or AMD Zen + processors (Ryzen 2000). Nonsupported computers can still install Windows 11 but the experience will carry and updates won’t be issued from Microsoft in the future. You may want to think twice before installing windows 11 on unsupported hardware. Windows 11 brings performance improvements and efficiency to the core and is supposed to make these slower PCs a little faster.
To update to Windows 11, head over to Settings > Update & Security then check for windows updates. To try beta versions of Windows 11, sign up for beta then choose the version of the update that you would like. I recommend public beta as it is more stable, unlike canary.
Remove old installation of Windows
Windows automatically saves older installations when a major upgrade is done to enable a user easily revert back to it if the need to do that arises. Windows saves old installation if Windows in a folder called windows.old under C: drive when you perform a major update. Delete this folder to free up space if your current installation of windows works just perfectly okay and you won’t need to revert back. This folder is typically over 30 GB.
Freeing up space give windows space to perform virtualization which speeds up Windows for systems with low C drive capacity.
Upgrade boot drive to SSD (C:)
This is the single most important upgrade that you can do to your computer to boost performance and you will notice it instantly from navigating the interface to launching apps. Your computer will feel brand new. First, check if you are already using an SSD by opening the Task Manage then navigating to C: statistics under performance. HDD or SSD will show up next to the drive letter.
If you have an SSD around, put it in your system and use it as a boot drive to enjoy the performance upgrade. If you don’t, then this unfortunately will cost some money. Luckily for you, SSD prices nowadays are close if not the same as HDDs. A 240 GB Kingston SATA SSD goes for $28.99.
Change Thermal Compound
Your computer’s processor needs to stay cool so it can perform optimally. If it happens to under load and the heat sink cant conduct away heat fast enough, it will slow itself down in a process called thermal throttling. This helps to protect itself from heat damage. Using a computer over very many years gradually dries up the thermal compound and will need replacement to restore efficiency.
I recommend taking this to someone who has experience in opening computers so they can change the thermal compound.