


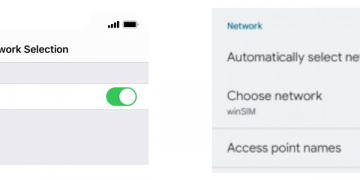


Access Point Name(APN) is the name of the gateway on the service provider and provides access to the internet and security to users using 5G, 4G, 3G, and more supported wireless technologies. The settings are unique to cell service providers and they require a user to set them up before browsing the internet. In many situations, networks have APN settings configured automatically but you may need to set them manually when this does not happen. Set your device to automatically select the available network in your region.
To be in a position to automatically connect to the internet, ensure that you have an active SIM card or an active eSIM capability then turn on the internet. Turn off Airplane mode.
- APN Internet Settings on iPhone
- Android APN Settings Page
- APN Internet Settings on Samsung Galaxy Devices
- APN Internet Settings on Google Pixel
- APN Internet Settings on Huawei Smartphones
- APN Internet Settings on Nokia
- APN Internet Settings on Xiaomi
- APN Internet Settings on Sony Xperia
- APN Internet Settings on LG
- APN Internet Settings on Windows Phones
APN Internet Settings on iPhone
To set up APN settings on iPhone running iOS 15 or later, navigate to Settings > Cellular > Cellular Data Network. Some regions have Cellular named Mobile and the APN settings remain the same for your carrier. You will find the fields listed below.
- APN:
- Username:
- password:
Search the appropriate APN Internet Settings below for your network provider then input the settings and restart your iPhone or iOS device.
How to save APN on iPhone
iPhone do not have a save option for APNS. Once you have entered APN settings for your carrier, click on the back arrow and APNs will be saved automatically.
You can proceed to restart your iPhone if this does not take effect immediately. Restarting an iPhone involves shutting it down then starting it up once more. There is not dedicated shut button unlike Android devices.
Android APN Settings Page
The default Android APN settings page can be found under Settings > Network & Internet > SIMs > Select SIM > Access Point Names.
APN Internet Settings on Samsung Galaxy Devices
Samsung Galaxy devices have this location slightly different when compared to devices running stock Android but still the Access Point Name. It is under Settings > Connections > Mobile Networks > Access Point Names. Here you will find the options below.
- Name:
- APN:
- Proxy:
- Port:
- Username:
- Password:
- Server:
- MMSC:
- MMS Proxy:
- MMS Port:
- MCC:
- MNC:
- Authentication type:
- APN type:
- APN protocol:
- Bearer:
- Mobile virtual network operator:
Add a new Access Point Name Unique to your service provider, you can find APN Internet Settings Unique to your Service provider. Save the settings then select the newly added APN and restart your device.
APN Internet Settings on Google Pixel
For Google Pixel devices like Google Pixel 6, navigate to Settings > Network & Internet > SIMs > Select SIM > Access Point Names.. Click on the three menu dots on the top right-hand corner, then click on New APN and you will find the fields below.
- Name:
- APN:
- Proxy:
- Port:
- Username:
- Password:
- Server:
- MMSC:
- MMS Proxy:
- MMS Port:
- MCC:
- MNC:
- Authentication type:
- APN Type:
- APN Protocol:
- APN Roaming Protocol:
- APN Enabled:
- Bearer:
Input the appropriate APN Internet Setting according to your service provider, select the newly added APN then restart your Pixel device.
APN Internet Settings on Huawei Smartphones
Navigate to Settings > Mobile Network > Mobile Data > Access Point Names (APNs) . Here you will find three dots on the right-hand corner, tap them then tap new APN. The options listed below will appear.
- Name:
- APN:
- Proxy:
- Port:
- Username:
- Password:
- Server:
- MMSC:
- MMS Proxy:
- MMS Port:
- MCC:
- MNC:
- Authentication Type:
- APN Type:
- APN Protocol:
- APN roaming Protocol
- Bearer:
- MNO Type:
Save then select the newly added APN Internet settings specific to your service provider.
APN Internet Settings on Nokia
For Nokia devices running Android, navigate to Settings > Network & Internet > Mobile Network > Advanced > Access Point Names. Tap to add Access Point name and you will see the options listed below:
- Name:
- APN:
- Proxy:
- Port:
- Username:
- Password:
- Server:
- MMSC:
- MMS Proxy:
- MMS Port:
- MCC:
- MNC:
- Authentication Type:
- APN Type:
- APN Protocol:
- APN roaming Protocol
- Bearer:
- MNO Type:
Save the APN settings According to your service provider then restart your device for the settings to take effect.
APN Internet Settings on Xiaomi
For Xiaomi devices running MIUI (Mobile Internet User Interface), navigate to Settings > SIM Cards & Mobile Internet > SIM 1/ SIM 2 > Access Point Names > New APN. You will find the fields listed below:
- Name:
- APN:
- Proxy:
- Port:
- Username:
- Password:
- Server:
- MMSC:
- MMS Proxy:
- MMS Port:
- MCC:
- MNC:
- Authentication Type:
- APN Type:
- APN Protocol:
- APN roaming Protocol
- Bearer:
- MNO Type:
Save then input your carrier-specific APN Internet Settings. Save then restart your device.
APN Internet Settings on Sony Xperia
Navigate to Settings > Network & Internet > Mobile Network > Advanced > Access Point Name then add the respective APN Internet Settings specific to your service provider as it appears in the fields listed below.
- Name:
- APN:
- Proxy:
- Port:
- Username:
- Password:
- Server:
- MMSC:
- MMS Proxy:
- MMS Port:
- MCC:
- MNC:
- Authentication Type:
- APN Type:
- APN Protocol:
- APN roaming Protocol
- Bearer:
- MNO Type:
Save, select as the active APN then restart your device.
APN Internet Settings on LG
To get APN settings on LG smartphones, navigate to Settings > Networks > More > Mobile Networks > Access Point Names. Click on the three dots on the top right then Add APN. You’ll see the settings below, input the appropriate settings then restart your device.
- Name:
- APN:
- Proxy:
- Port:
- Username:
- Password:
- Server:
- MMSC:
- MMS Proxy:
- MMS Port:
- MCC:
- MNC:
- Authentication Type:
- APN Type:
- APN Protocol:
- APN roaming Protocol
- Bearer:
- MNO Type:
APN Internet Settings on Windows Phones
Windows Phone devices that Include Microsoft Lumia, Nokia Lumia, and more, navigate to Settings > Mobile + SIM > SIM Settings > Manual Internet APN then input the settings in the fields that appear as below.
- APN:
- Username:
- Password:
- Authentication type:
- Proxy Server URL:
- Proxy Port:
- IP Type:
Input your APN Internet Settings specific to your service provider then restart your device.